Music Production Tutorial #4
How To Fix Crashes In Logic X
This tutorial includes a few quick tips on how to fix crashes in logic X that help you to keep Logic X running.
As computers get more powerful, plugins get more resource hungry to match. This means that no matter what system or DAW you are using, Logic X, Protools, Cubase, Reaper etc. you will always stretch resources to a maximum. Playback or recording will stop and you’re greeted with the message:
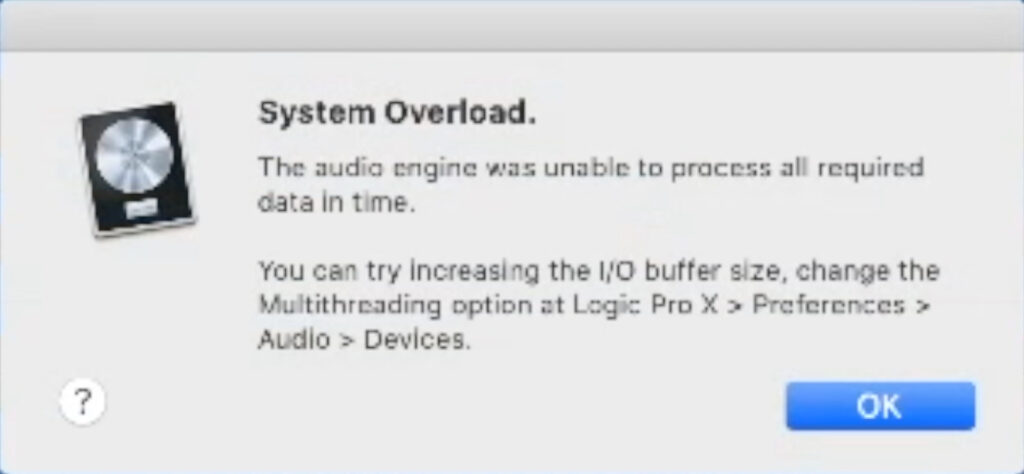
Usually the problem is ram and processor related. This article looks at how to run things so that these two elements are used efficiently.
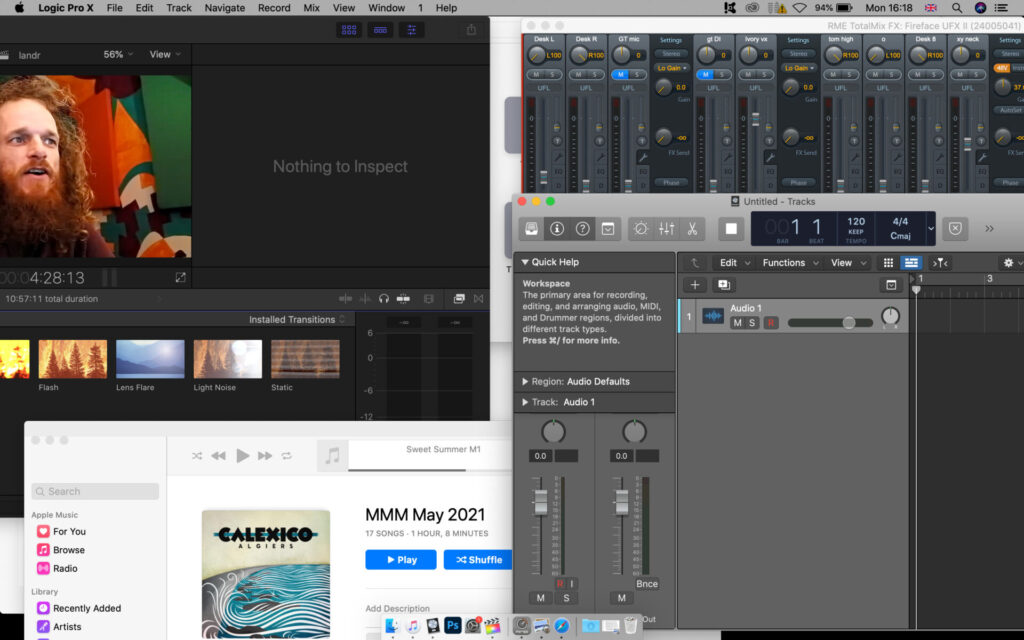
Turn Off All Other Programs
This may be obvious but you’d be surprised! Every program uses a certain amount of RAM and Processor cycles when it’s on. This is true wether or not you use it or not. It’s advisable to shut down everything: browser, music player, video editing software. Anything that you’re not using, turn it off.
This will make life easier for your computer and allow it to devote all resources to your DAW.
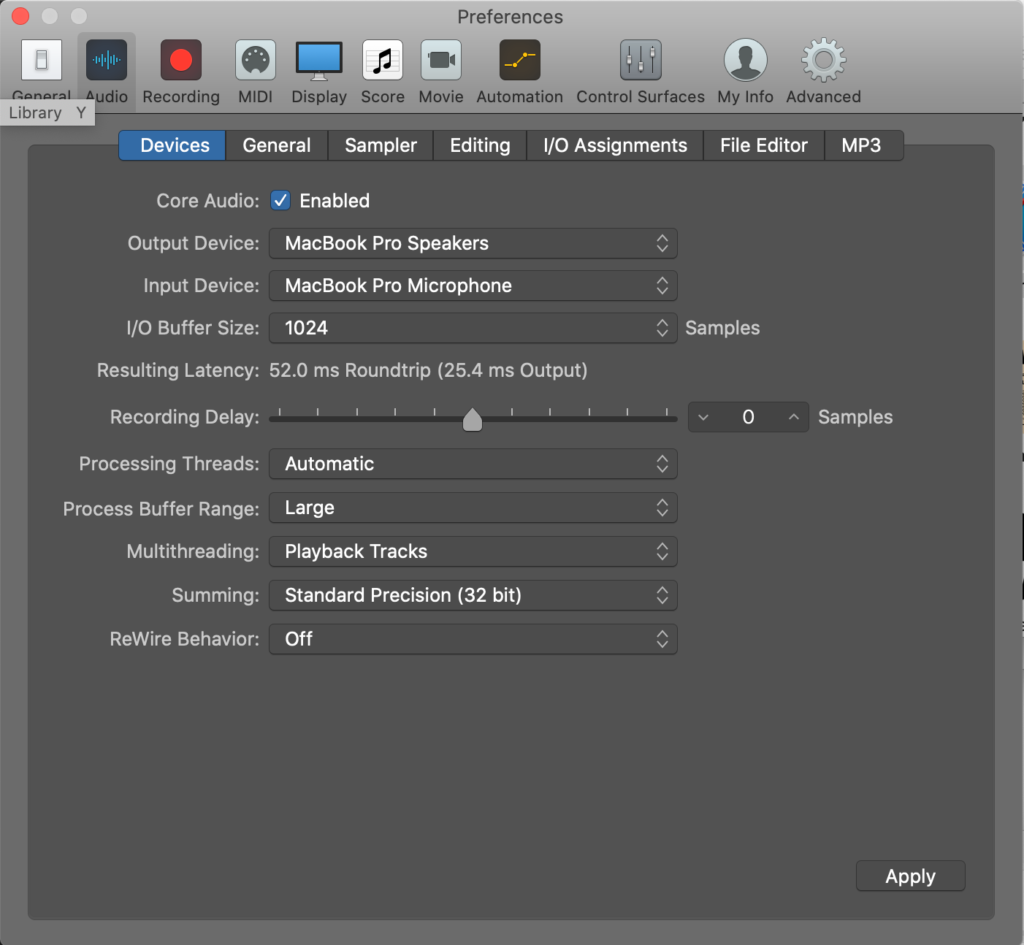
Adjust Audio Driver Settings
OK now the meat. Click Logic Pro X > Preferences > Audio.
This brings up your audio interface preferences. The biggest impact is made by the I/O buffer size. Usually the issue is that the buffer is too small and it needs to be bigger but occasionally it’s too large and needs to be made smaller.
It’s worth noting that when recording, higher buffer settings will mean more latency when recording into Logic. This becomes noticeable when you are laying down multi-tracks. The track you are recording may be out of sync with what you have recorded when you listen back!
Another setting that will make a big difference is the summing option. Set this to the lowest (32 Bit). This will mean that during playback you hear a slightly lower quality audio than for 64 Bit. It is still very high quality though and will not be a problem for mixing or recording.
I find keeping the ‘Process Buffer Range’ to Large gives the best results.
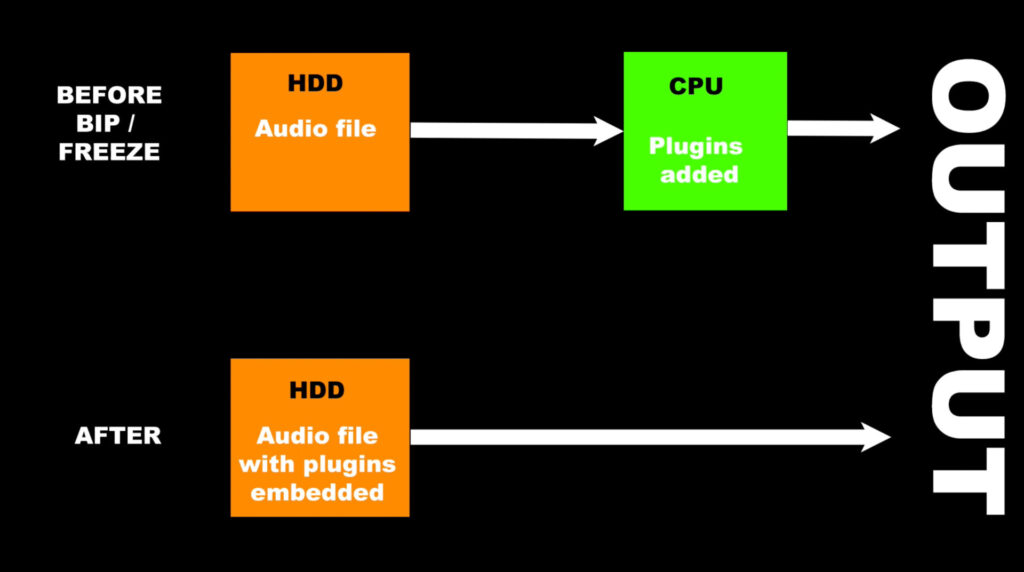
Bounce In Place (Bip)
This will ‘bounce down’ any plugins and effects into an audio file. Usually your raw, dry audio file is playing back and the CPU is adding the plugins in real time. Once bounced down your audio file will have the plugin embedded and so will not be troubling the Processor:
To do this just right click the audio file and select ‘Bounce In Place’ from the menu. You will then see the below box. I would use the settings below. This will create a new track with the bounced file on but also keep the original in your arrange window. Click OK and the track will bounce down.
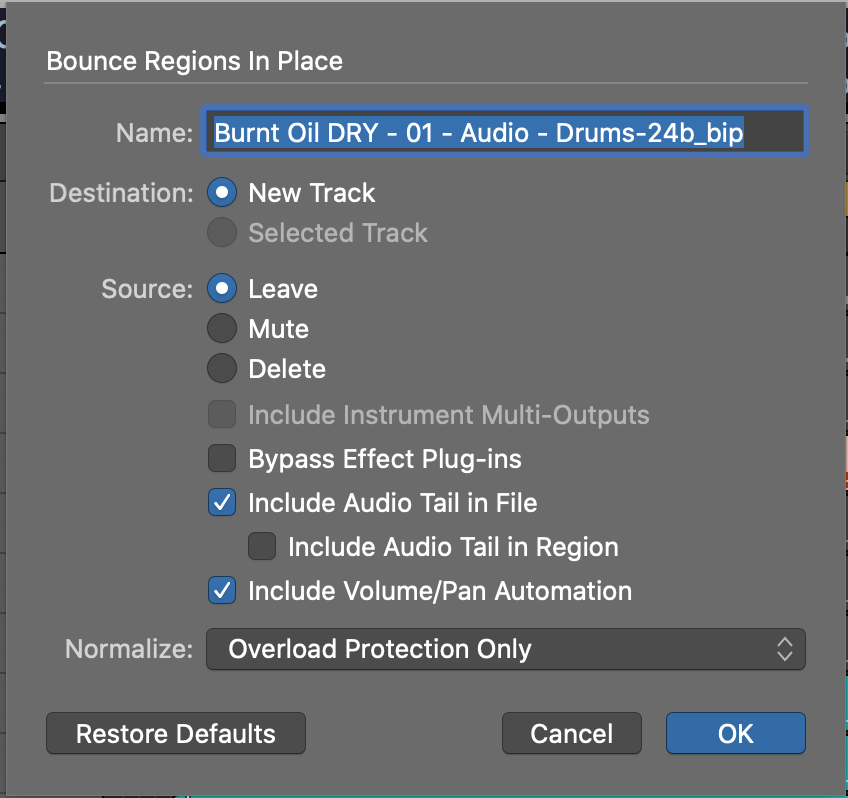
The one drawback here is that you will not be able to adjust the plugin settings of this bounced track. It is best then to only do this for tracks you are more happy with. You can of course get back to the editable version, it will still be there.
This will remove some load from the processor. You can extend this significantly by removing the plugins from your project altogether. To do this, save the project, then save
Freeze
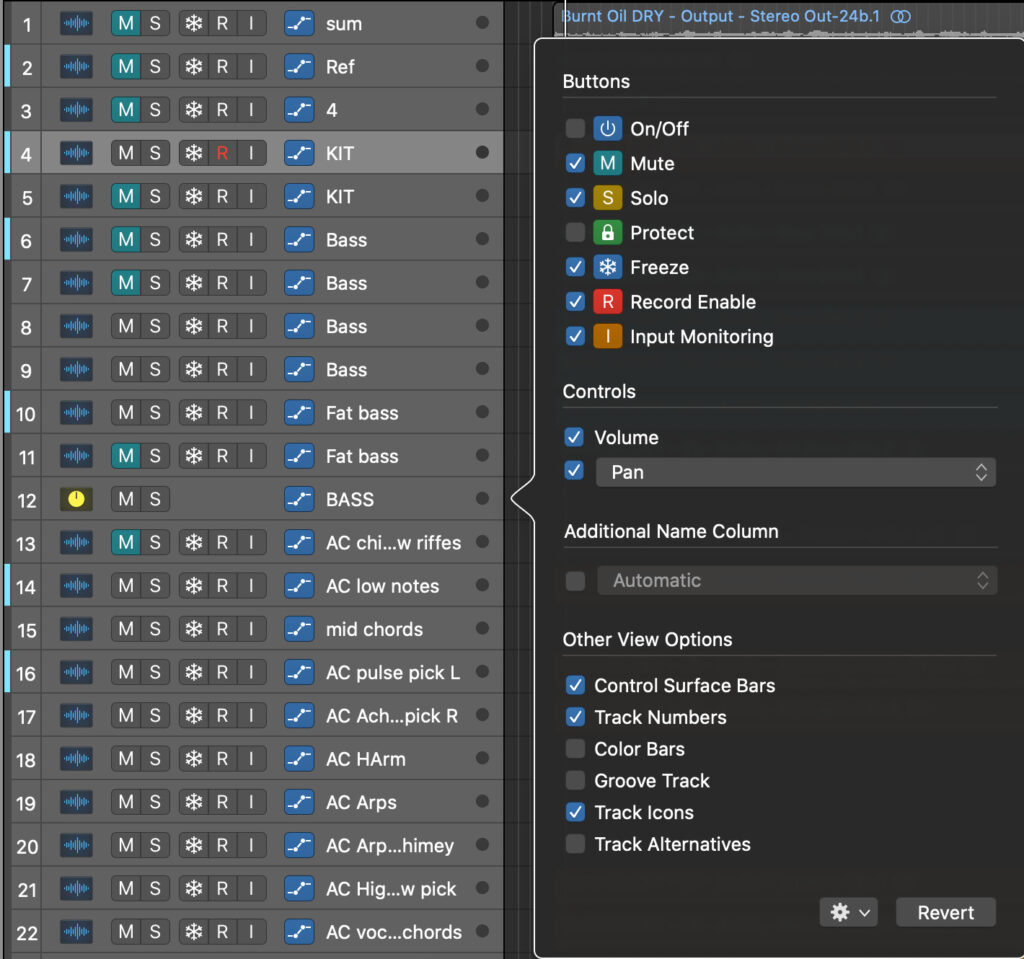
This is very similar to Bounce In Place but is a little more user friendly, especially when working with a lot of tracks. Your track header (which contains the track name, mute/solo, volume fader) usually contains the freeze button but it may not be set to show up. Right click the track header and select ‘configure track header’. This will allow you to select what appears in the header. Make sure ‘freeze’ is selected which is a green square with a snowflake inside.
As discussed before, take the tracks you are less likely to adjust and click the freeze button on them. When you have selected all of them, just press play and Logic will crunch the numbers to freeze the tracks.
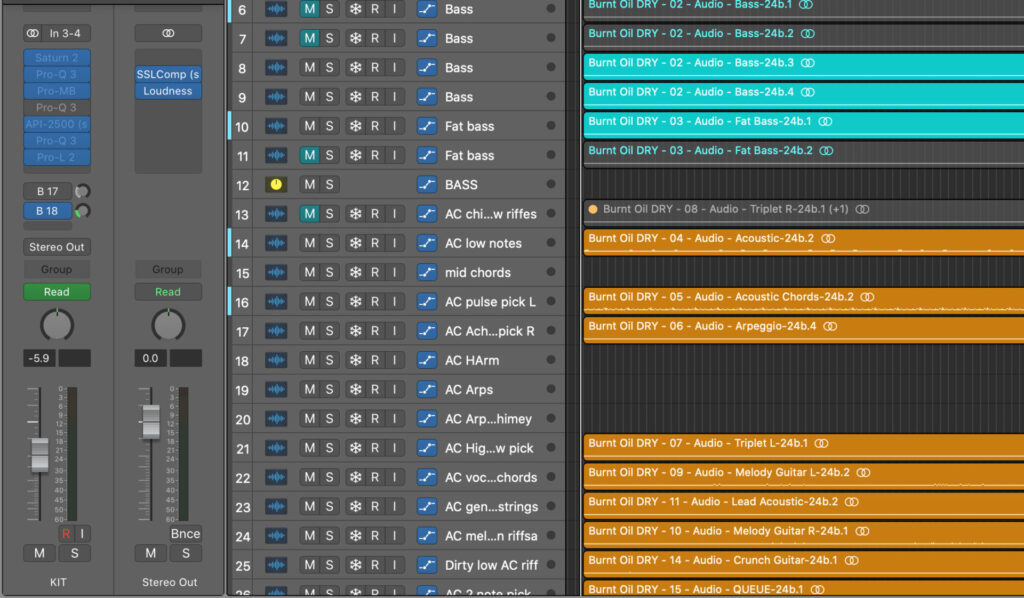
You can’t adjust the plugins on the tracks as they are now embedded as audio files. The difference compared to Bip is that this audio file is not visible in the arrange. The benefit of freeze is that to un-freeze the track, just click on the icon and you’ll be back to the original version of the track.
Low Latency Mode
There is one button in the menu bar that will turn off all the latency inducing processes. This is one to be careful with as latency will be introduced to the tracks with these plugins on. This means it’s a handy tool to quickly find out if it is indeed plugins that are causing the crashes.
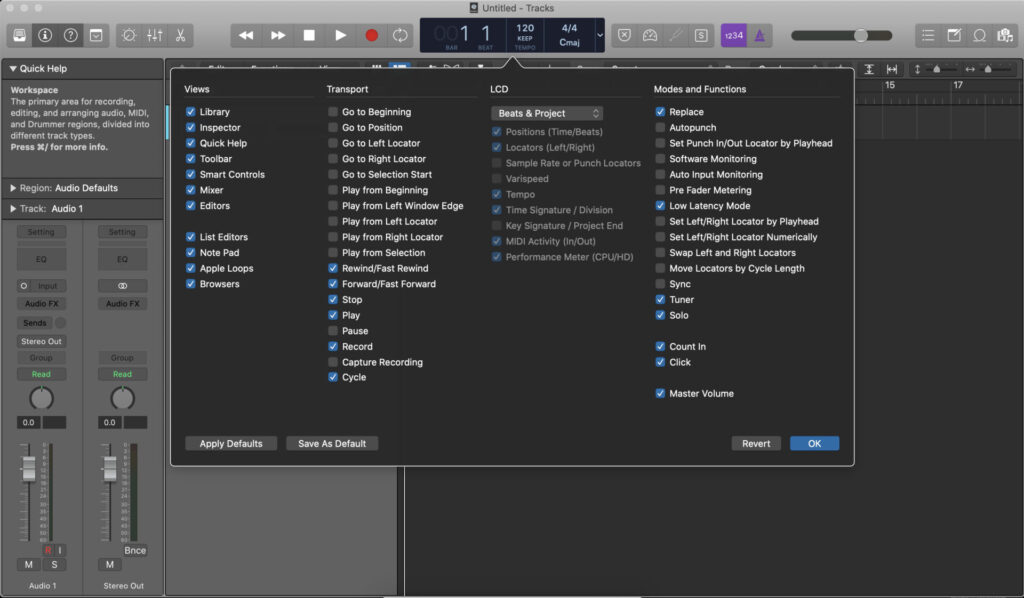
To add this option to your control bar just click on the little arrow on the right hand side of the LCD style display in the top middle of the screen. Now you can configure what you want to see. On the right of the menu select ‘Low Latency Mode’ and this will put a button in your control bar to do just that.
How to Fix Crashes In Logic X
I hope this article on how to fix crashes in Logic X has helped you. If youm have done all this and you still have the ‘system overload’ message then there may be another issue. Sometimes a bug can develop with Logic, Plugins or your sound card drivers. Try re-installing or updating to a newer version to rectify this.
One final point to remember is that these measures will only allow you to maximise what resources you do have. Eventually you will just be at the limit of what processor and RAM you have. The only thing to do then is upgrade your machine or use fewer, or at least less resource hungry plugins.
>>Go to other music production tutorials<<
or
Check out the full video on this: