Music Production Tutorial #3
How To Mix A DAWless Jam
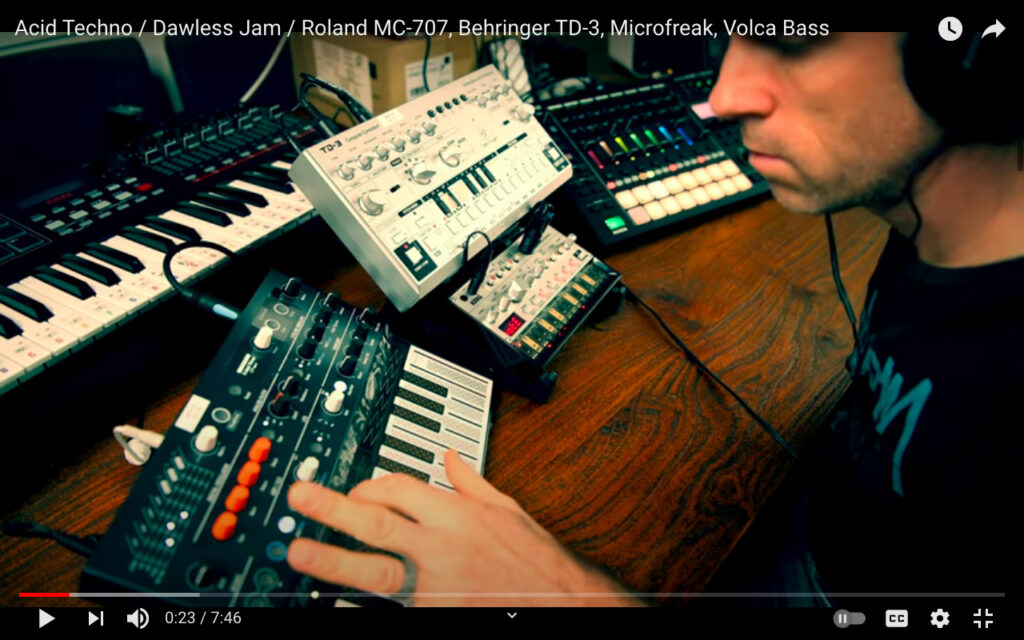
This tutorial looks at how to mix a DAWless jam in Logic X. It’s an Acid Techno jam using the Roland MC-707, Behringer TD-3, Microfreak and Volca Bass.
A DAWless jam is the name we give to music creation outside of ‘the box’ the DAW, our beloved computers. The jam generally uses a host of hardware synths, samplers and sequencers connected with patch cables and is a very refreshing way to make music as computers tend to dominate the process these days.
We are taking a DAWless jam and bringing it back into the box to add some finishing touches.
The track in question is by my old friend Frank who has been a DJ for a long time but is just a few months into his adventure with DAWless jams and music making in general. Check out his Youtube Channel as he’s making a video every week at least.

I’ve decided to start doing some videos of full mixdowns and this will be the first one. It’s different for me as I’ve never mixed a DAWless Jam and so these are my off the cuff reactions. It’s about 1 hours work but the video took a bit longer as I had to explain what I was doing 🙂
So here we go, how to mix a DAWless jam. Let me know what you think in the comments. Theres a long and short video, the first being real time, the second is cut down to the explanations only.
Organising The Mix Project
With any mix it’s a good idea to orientate yourself and make the project easy to work with. I play the song through, work out what sound is on each track and label + colour each as I go. As the track plays through I get an idea of the overall shape of the arrangement and the function of the individual elements. I start to notice what could be improved and I make a rough plan in my head of what to do.
The Plan On How To Mix A DAWless Jam
Immediately I had noticed that there was a lot of overlap/masking of sounds in the mids and low mid range. It’s a case of working out what sounds have priority/sound best in this range and allowing them to be present by making space in sounds where that mid range plays a less important role.
The track is very mono as it’s a combination of mono tracks panned centrally. There’s no stereo information at all so it would improve matters a lot to add some stereo effects and movement. The lack of mix buss compression was noticeable also, the drums sounded very detached from the other elements so I would add that first. The last thing I planned to do was use some automation to make the overall shape of the tune more dynamic and accentuate certain sounds and FX at different points.
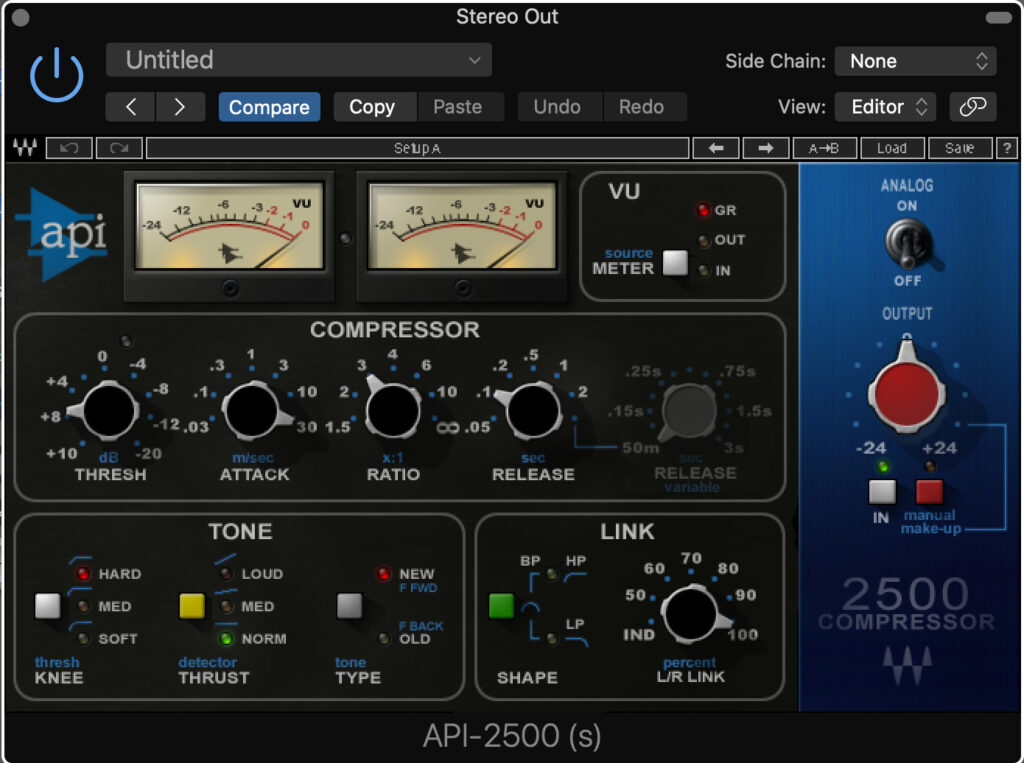
Mix Buss Compression
I used the API-2500 which has a nice fast compression character and colourful tone. I set the Attack to 30ms and the release to 100ms. Ratio was 3 and threshold was set to compress a couple of dB for each kick drum. It’s only the kick that is pulling at the compressor. This is typical for electronic music but this immediately glues the mix together nicely.
Acid Vibes
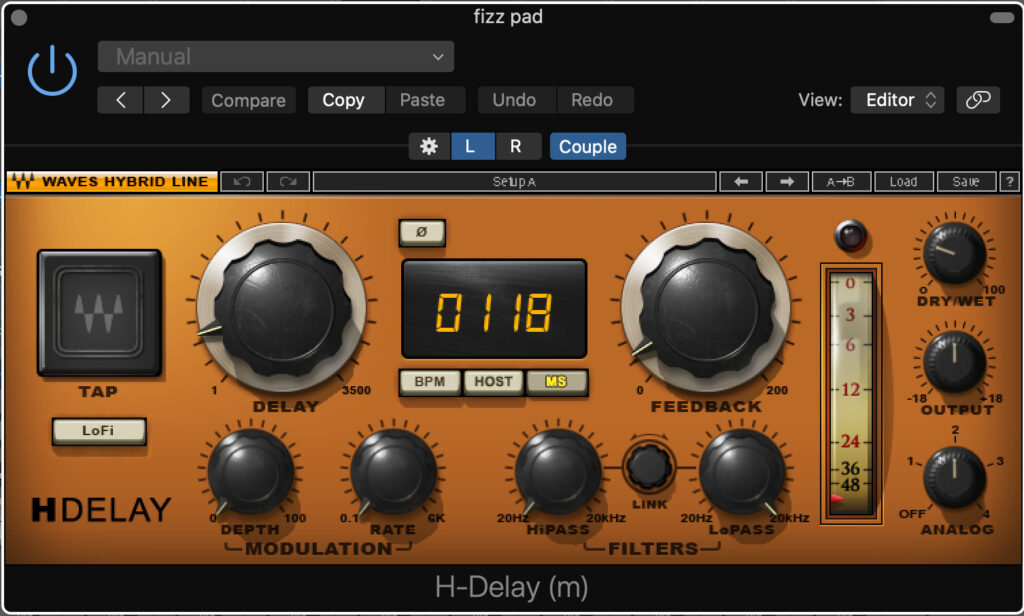
I dived into the acid line first as it’s key to the vibe of the tune. This was sent to a buss and first added a H-delay delay plugin to give it some subtle stereo movement. I tap tempo’d the delay and set to ping pong so each repeat goes alternately left and right. After this, the signal on the buss passed to some Manny Reverb to add a bit more vibe and atmosphere.
The important thing to note is that the delay output is set low so we’re sending about 80% dry to the reverb plus a small amount of delay. As the delay is only 20% and is going straight to a reverb you can’t hear it that well but it does the job of kicking up the reverb and it’s ping pong effect makes the reverb sound wider.
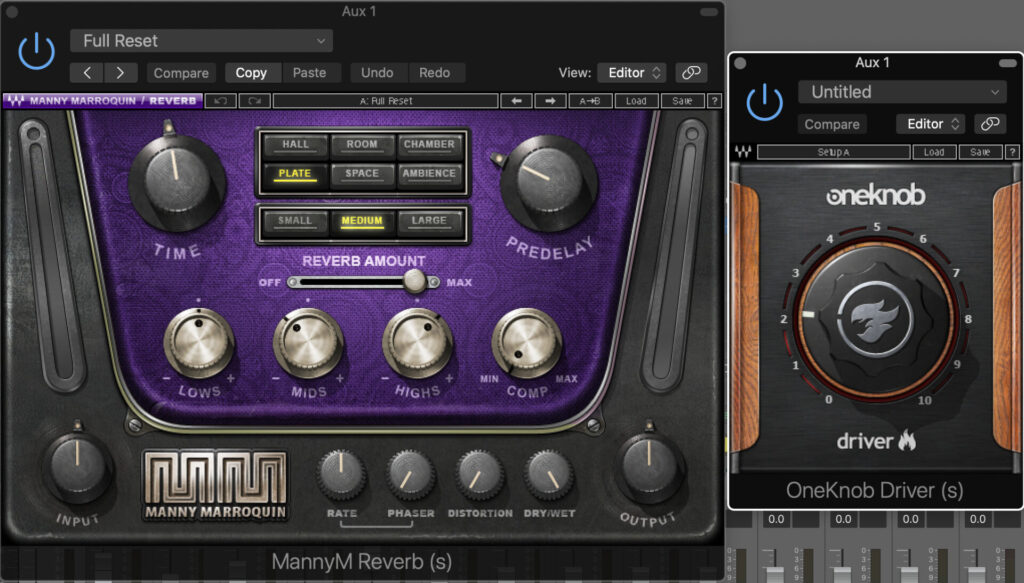
After I got this effect, I added some ‘One Knob Driver’ which is an overdrive/saturation plugin. I do love the effect of a saturated or even distorted reverb, it feels edgy, aggressive and older/retro. I guess my ear relates it to older recordings where natural room ambience on recordings has been pushed hard through analog consoles and the like. Finally I added a peak on the EQ around the cutoff frequency with a Fab Filter Pro-Q 3.
Bass Macro Dynamics
This sound was coming in and out of volume as well as having micro dynamics within the part so compressing it was a little tricky but necessary to hold its place in the mix. It really was a case of judging what sounds good over a minute or two and what settings cope well with the sound wether the macro dynamics fall or rise.
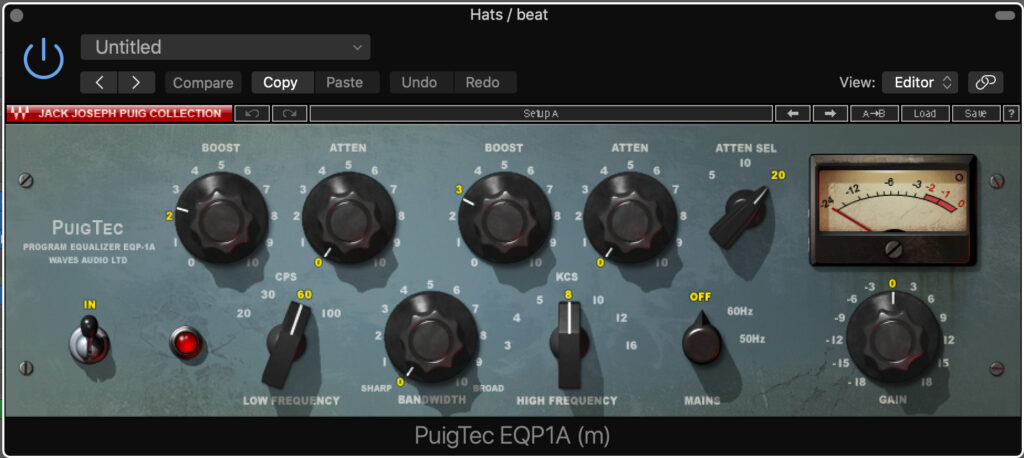
I used a Puigtec EQ to enhance the low end at 100Hz. It’s a nice characterful valve-modeled plugin which sounds great for broad boosts. After that I used the more precise and transparent Pro-Q 3 to cut out the mid range around 500Hz where it was clashing with the other sounds. In this way, the bass arpeggio found its own space in the mix a bit more and did not clash. I also removed a touch of 70Hz to allow the kick to punch through the bass better.
Drum Boosts
I didn’t want to go mad with the drums but I wanted to sharpen the hi hats and give them more aggression. An 8Khz boost with the Pultec clone Puigtec EQ gave the effect I was looking for. I also boosted a tiny bit of 60Hz to give the Kick more weight. Overall, this had the effect of stretching the drums up and down frequency wise and increasing the overall spectrum of the tune. Later on I also decided to remove a little bit from the kick drum at 200Hz, this made the kick a bit sharper and less flabby whilst also opening up space in the mix for all those bass sounds to breathe.
Sword Sound
This was fun but I had no idea what I was going to do with it! I just dived in with some effects and aimed to make it more interesting. I went for a flanger (Arturia) plus a long reverb (Fabfilter R-Verb) and Fabfilter Timeless delay.
Fizz Pad
I wanted to make this seem a lot wider and also to emphasise the fizzyness of it. To widen it I used an H-Delay plugin in dual mono mode. I start by using couple more so both L and R are set with a very short delay and no feedback. Then I uncoupled the channels and adjusted one side’s delay time so the time of arrival for each speaker would be different.

After that it was a case of using an API 560 EQ to boost a little around 4K and cut out the low mids and a bit of bass as these really weren’t necessary for the effect that that sound is primarily creating. The bass horn like element of that sound is still audible but is more restrained and throaty so it does not contest with the other bassy elements of the track. All that was left was to compress to push the sound to the front despite its crescendo. I used an 1176 clone by Arturia for this.
Bass Squelch
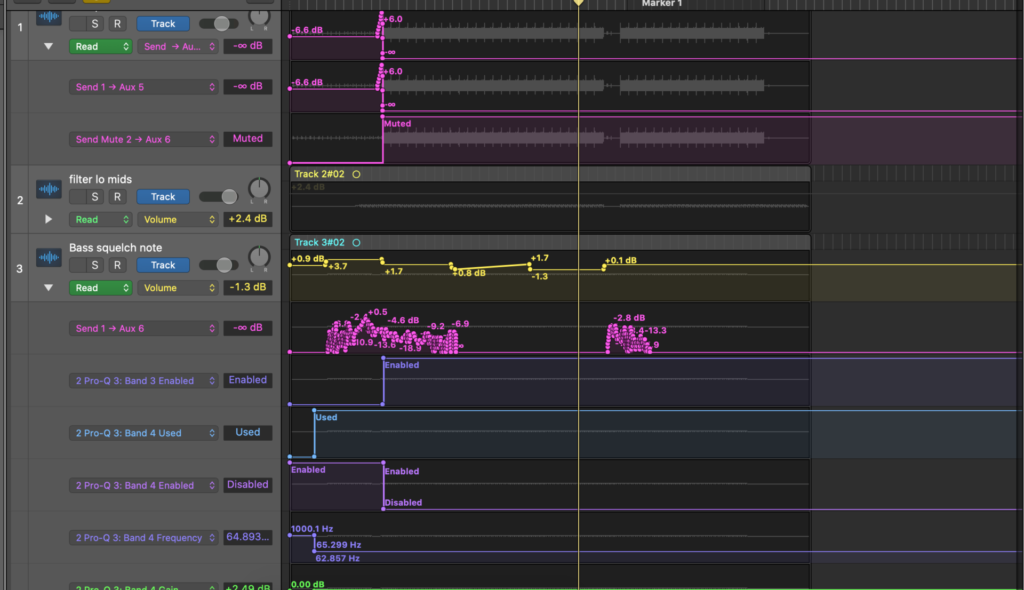
This long squelchy bass pad note was tricky as it was all over the same lower ranges that were occupied by the bass and kick drum but it didn’t have much else going on. I boosted the mids around 1.6K to give it more of a nose and cut a little low mid. It was also compressed to prevent it slipping into the background. I decided to automate this sound heavily so that it became a feature in some places and was removed at other points where the track was busy already. A 160ms delay was also added at around a 30% mix with the low end removed which made the sound more interesting.
More Low Mid Mud
The filter sweep sound here had a similar issue to the other sounds involved. A lot of low end mud meant that it would clash with other sounds. I compressed with the API-2500 to emphasise the low mid range. Then I added a Fabfilter Volcano filter sweep plugin to extend the squelchyness of the sound which was a little lacking. To give some stereo movement I used an auto panning plugin, Brauer Motion from Waves. This gave a nice bit of stereo movement which adds interest to the track but also prevents the sound from getting lost in the mix!
Automation in the DAW
The final part of how to mix a DAWless jam is automation. To keep the track exciting and varied it’s always a good idea to use automation. This allows you to highlight different elements at certain times by increasing volume, brightening the sound or manipulating them in other ways.
I listened through to the track as it was and decided roughly what I should do. The start of the tune did sound a bit empty so I added some effects to the hi hat/clap sound. A delay worked so I automated that for the start of the tune and faded it out slowly over time.
The bass squelch note was getting in the way later in the tune so I removed bass as described above. The start offered an opportunity to show off the bass in the sound as it had the room to breathe. I automated the cut I had on the EQ later in the tune. Now it starts off as a low boost and switches back to a cut when other bassy sounds enter. I also added some reverb to this sound during the intro which recedes as the track picks up. I actually manually automated the send level for each note. The attack is a lot drier and as the note sustains/releases the send goes up. This gives the feel of the sound getting closer to the listener and moving away.
The low pass filter (Fabfilter Volcano) on the bass arpeggio was automated at the cutoff frequency during the intro. Once again, this added interest to this section.
I went through the track, gradually altering the volumes of different layers to make the arrangement feel alive and dynamic.
First Pass The Post
By now, a ‘first pass’ was complete. Everything was addressed at least once and the overall shape of the tune was sketched out. This would usually take an hour or so. Following this I would aim to come back to the tune the next day and listen through, making some adjustments. This might even be done a third time before looking at mastering the tune.
I hope that’s given you an idea of how to mix a DAWless jam! Check out some more of Frank’s DAWless jams here.
If you have an idea of what the next mix video should be, let me know!