
Music Production Tutorial #1
How To Set Up A Compressor
What is a compressor?
Compressors are used all the time in music production, in the studio and at live shows. In a nutshell, it is automated level control. It does this by turning down the volume when it crosses a certain level. This level is called the threshold.
Compression was first devised for the movies to even out the level discrepancies between male and female voices on a recording. These days, we’re using it on all kinds of sounds in one way or another and it’s an essential step to get different sounds to sit alongside each other within a mix.
What do the dials do?
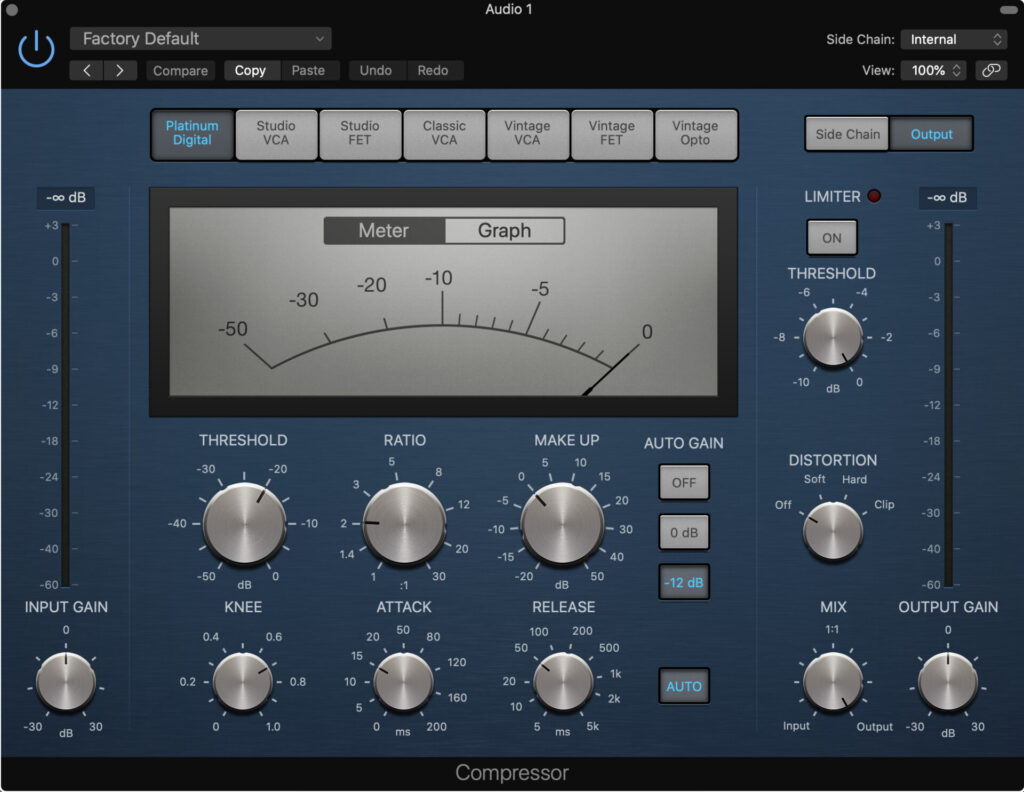
There are often a few other controls but here are the main ones:
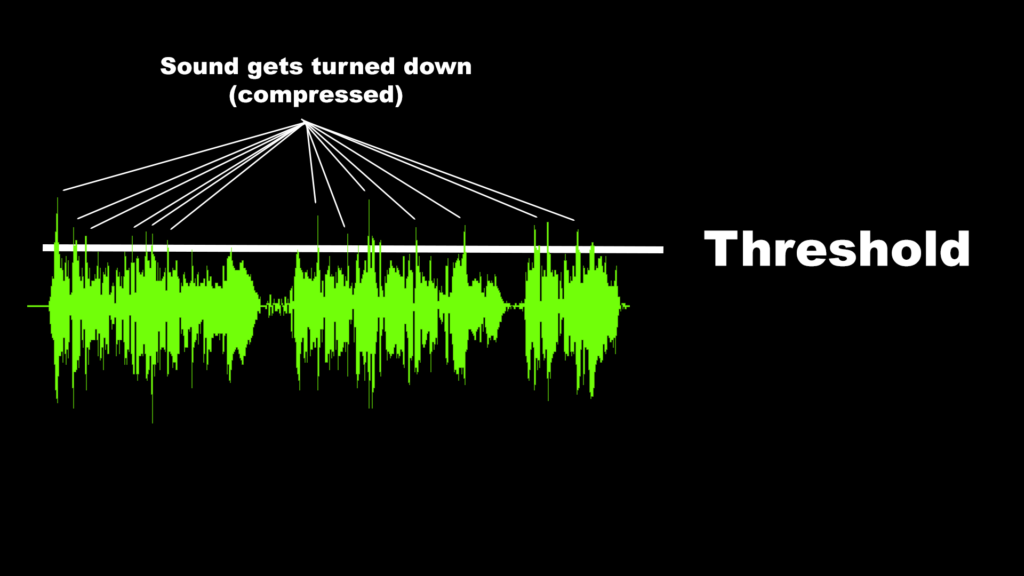
Threshold
This is the level over which the compression behavior will begin:
Ratio
This is the strength of the compression when it occurs. A ratio of 2:1 means that for every 2dB the signal was going to go over the compressor, it will only allow it to go over by 1dB. Essentially, it would halve any volume above that point. If the ratio was 5:1 it would allow the sound to over the threshold by 1/5th what it ‘wanted to’. This would mean a sound that would have been over the threshold by 10dB is only allowed to go over by 2dB.

Knee
The knee is the transition between compressing and not compressing. A hard knee will mean that, as described in the threshold section, as soon as a sound passes the threshold it will be compressed and as soon as it drops below compression will stop. In practice this can sound unnatural and is often not desirable.
A softer knee blurs that boundary. As the sound approaches the threshold, the sound is compressed a little and increasingly more as it crosses the threshold until the set ratio is reached. If you set your knee to maximum softness, the sound will always be compressed a little bit
You can see below the difference between hard knee (left) and soft knee (right).


Attack
This allows you to add in a delay between a threshold-crossing sound being ‘heard’ by the compressor and the compression beginning. This is usually expressed in milliseconds and can be anywhere from 0 to 200ms but this figure varies a lot depending on the unit.
The purpose of this is to allow a bit of the attack of the sound to slip through the compressor unchallenged. This can help a sound sound more natural, have more brightness and punch. It can also manipulate the perception of the groove: a short attack will put the instrument behind the beat and a long attack will let it sit where it was played.
Release
Similarly, the release will control how long it is after the sound drops below the threshold that the compressor stops acting. Timings can be from 0ms to 5000ms which again vary.
Release times can affect the tone and rhythm of sounds quite significantly. Too long a release will mean that the sound is being compressed when it is well below the threshold and too short a release will sound rather artificial. Usually you want to set the release so that the compressor has a short enough release to recover before having to compress again.
Once more, this can affect the groove significantly. A longer release gives us a longer sounding note and generally a wider, fatter tone and a short release will give a shorter sounding note.
How to set and adjust the compressor controls
- To set up a compressor I will usually put the threshold at maximum and run the track.
- Using a 3:1 ratio, I will pull down the threshold until I’m hearing the sound even out dynamically.
- Usually I will leave the knee around the middle to begin with and then it’s a case of adjusting the attack and release times.
- Firstly I will use the release and move it back and forth until the rhythm/tone feels right.
- After that I will open up the release to get some more attack on the note or presence in the mix.
- Once this initial setting is dialed in, appraise the results and go round again.
- So, adjust the threshold and ratio if there needs to be more/less compression.
- Review the knee setting, the compression can become less noticeable with a soft knee.
- Tweak the attack and release settings

How to set up a compressor for vocals
Have a look at the video for more specific examples of vocal compression.
- Set the threshold and ratio as described above. We want some dynamics according to the style and your taste but the vocal needs to sound clear. We don’t want the vocal poking out or getting lost and we don’t usually want to hear the compression working.
- Adjust the release time so the right rhythm is achieved for the style. Check that the articulation in the voice is preserved as needed. Listen to how the vocal sits rhythmically when setting the release. Too much release and the individual syllables of the vocal won’t be heard, with the vocal becoming muddy. Too little release will cause the vocal to jitter and sound unnatural.
- Open the attack to a setting where the vocal sounds natural and bright enough. Too much of an attack will lead to the vocal not being compressed and will sit forward in the groove. Too little and the vocal will become indistinct and darker and will sit back in the groove.
- Generally, for a vocal the knee will be medium to soft. Try a softer knee to smooth out the effect of the vocal if it’s becoming too obvious
- It’s best to adjust all of these settings with your eyes closed. Listen for a sweet spot that sounds good to you. This will help train your ears.
Have fun setting up compressors and keep an eye on out on our tutorials page for tips on compression and more.